Users: How to set up user permissions
How do User Permissions work?
There are four different levels of permission, each permission level overrides the preceding ones. In ascending order these are:
Everyone - These permissions apply to all your users as a default. Note that this default set always exists on your system, but will not be visible to you until you add that permission set as in Step 1.B below.
Department - These permissions apply to all your users that have a particular Department on their user record. You can create Departments via Manage Users > Departments and then add a user to a Department by editing that user's record.. Note that creating a department does not create a permission set for that department, you need to add that permission set as in Step 1.B below.
User Group - These permissions apply to a custom defined group of users that you have previously created via Manage Users > User Groups. Note that creating a user group does not create a permission set for that group, you need to add that permission set as in Step 1.B below.
Single User - These permissions apply to one user only. Note that creating a user does not create a permission set for that user, you need to add that permission set as in Step 1.B below.
There are no restrictions on the number of permissions that you can set up and a user can be included within more than one set - however, the permission that actually applies to them would be that of the set that comes highest in the following order.
1. Single User overwrites
2. User Group overwrites
3. Department overwrites
4. Everyone
For example: by default you already have an Everyone permission set so, when you create a Department permission set for a Department called Agents, which contains the users 'Blackadder', 'Baldric' and 'MrsMiggins', the access that they have to the system will be what has been defined under the Agents Department permission set, as a Department overwrites any access defined by the Everyone permission set.
You then decide that 'Baldric' and 'MrsMiggins' should have access to something that the rest of the Agent department don't have. So you create a User Group called Minions that contains those users, then create a User Group permission set for Minions. The access that those two users have to the system will be what has been defined under the User Group permission set for Minions, as the User Group permissions overwrite those in the Department and Everyone permission sets.
In the same way, you could then set up a new Single User permission set for 'MrsMiggins' which will overwrite all other permissions.
Note that if a user is a member of multiple User Groups (and does not have a Single User permission set) then the most restrictive permissions in any set they are covered by will take precedence.
Setting up or editing User Permissions
- On the Administrator Homepage select Users > User Permissions
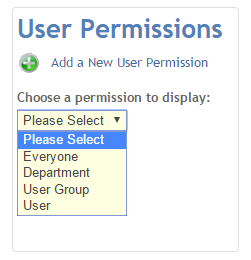
A: To edit an existing permission set: select the permission type you would like to edit from the Choose a permission to display drop-down then, from any further drop down that appears, the particular set you want to edit, and go to step 2 below. - Once you've chosen the type of permission you wish to create or edit the User Permissions screen is displayed. This is where you specify the access that users covered by the permission set will have.
 Here you can restrict the number of bookings that can be made, specify if booking on behalf of other users is allowed, whether pending bookings can be approved, etc.
- The Booking Limit per Resource section allows you to set how far in advance users can make bookings for each room/resource, or set them as not bookable.
 Click on the + next to Booking Limit per Resource to expand the section and you will see all your rooms/resources grouped by
To set the value of the default booking limit for the entire permission set use the drop down next to Default booking limit. This will then be the value automatically set for rooms/resources that do not have some specific limit applied. For example, if you set this as 6 months then any rooms with Default Limit set against them would then be bookable for up to 6 months in advance.
To change the limit against a certain room/resource choose the option you would like set from the drop down next to the room/resource.
If the users under the permission should not be allowed to book a room/resource select Not Bookable.
If the users should still be able view rooms they are not able to book ensure that Read-only access to rooms marked Not Bookable is ticked under Booking Limits.
 You can bulk update all rooms under a category to the same value by clicking Bulk Update next to the category description.
Select the relevant option from the drop down and then click Update.

Once you have made your selections or changes click on the green Save Changes button at the foot of the page. - To delete a permission just click the red Delete button displayed on the top right hand corner of the permission.
 B: To create a new permission set: from the Administrator Homepage select User Permissions > Add a New User Permission then select the permission type you would like to create from the Add Permission For drop-down.
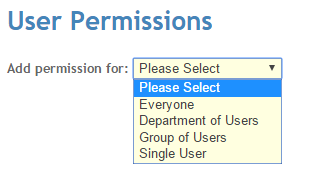 Depending on which type you choose, you may then need to select a further option:
Department - Departments (created via Users > Departments) that do not already have a permission set up will show on the drop-down.
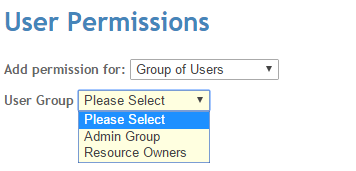
 User Group - User Groups (created via Users > User Groups) that do not already have a permission set up will show on the drop-down.
 User - Choose the name of the user from the drop-down . All users on the system, that do not already have a permission set, are displayed.
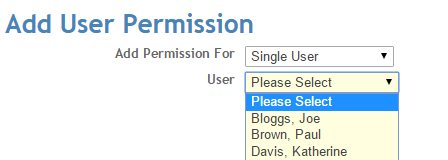
 Here you can restrict the number of bookings that can be made, specify if booking on behalf of other users is allowed, whether pending bookings can be approved, etc.
For more on Pending Bookings and Resource Owners see this article: Pending Bookings and Resource Owners
 Click on the + next to Booking Limit per Resource to expand the section and you will see all your rooms/resources grouped by

 You can bulk update all rooms under a category to the same value by clicking Bulk Update next to the category description.